Kubernetes Structured Authentication Configuration (v1.30+)
Until now, it was possible to log into Kubernetes via OIDC by setting the --oidc-* options on the API server.
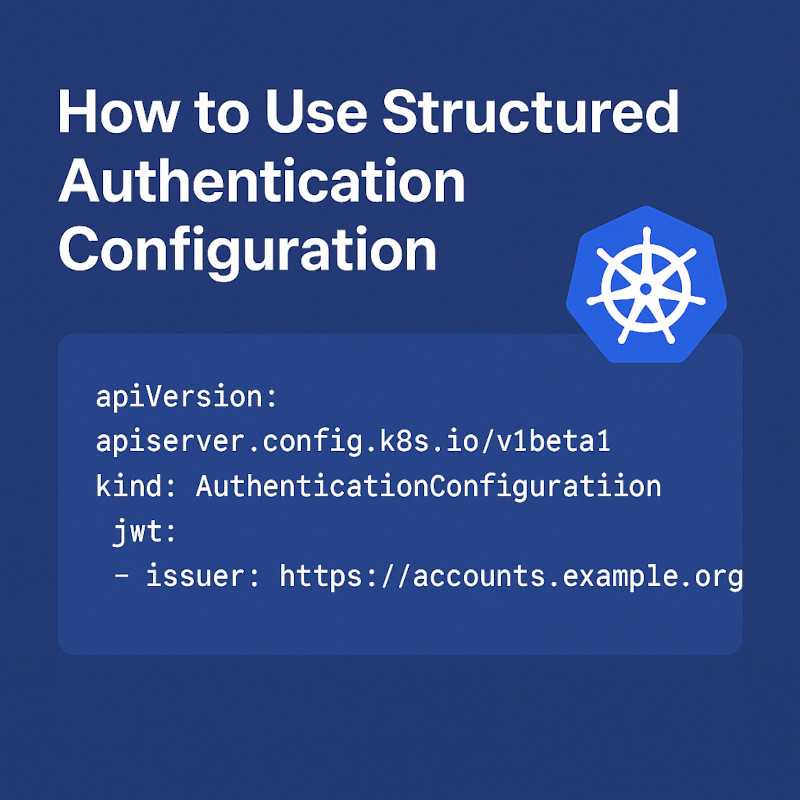
As of version 1.30, a new (beta) feature called Structured Authentication Configuration has been proposed.
To enable it, you need to add the --authentication-config parameter to the API server. In return, you gain access to many powerful features.
Key Features
Here are some of the capabilities you can take advantage of:
-
Dynamic configuration: No need to restart the API server to reload the
AuthenticationConfigurationfile — it is hot-reloaded. -
Multiple OIDC providers: You can now define multiple identity providers instead of being limited to just one.
-
Support for any JWT-compliant token
-
CEL (Common Expression Language) support: Enables advanced token validation logic.
claimValidationRules: expression: 'claims.hd == "example.com"' message: "the hosted domain name must be example.com" -
Multiple audiences: Configure multiple audiences for a single authenticator — e.g. use different OAuth clients for kubectl and the Kubernetes dashboard.
-
Manual discovery URL support:: If your provider does not support OpenID Connect Discovery, you can manually set the discoveryURL pointing to
/.well-known/openid-configuration. -
JWKS caching:: Public key files
(jwks)are cached, preventing frequent re-requests to the remote server.
The new form of Authentication also has some requirements
- The key URL must be
HTTPS(HTTPis not allowed). - The
issfield in the JWT must match the issuer URL exactly.
Example of a configuration file:
apiVersion: apiserver.config.k8s.io/v1beta1
kind: AuthenticationConfiguration
jwt:
- issuer:
    url: https://issuer.example.com
    audiences:
    - example-client-id
    certificateAuthority: <value is the content of file /path/to/ca.pem>
  claimMappings:
    username:
      claim: username
      prefix: "oidc:"
    groups:
      claim: groups
      prefix: "oidc:"
  claimValidationRules:
  - claim: hd
    requiredValue: "example.com"
  - claim: admin
    requiredValue: "true"
Example
Below is a step-by-step guide on how to enable the new authentication method in Kubernetes,
using a local K8s cluster installed on your own laptop.
For this, we’ll use kind — a Kubernetes cluster running in Docker.
To run a local JWKS server for hosting public keys, we’ll use ngrok so that the endpoint is served over HTTPS.
To generate the private key, you’ll need Python.
Requirements
You will need a few tools to get started:
1/5 Generate a private and public key.
We’ll generate EC (Elliptic Curve) keys — a 256-bit key equivalent in strength to RSA-2048.
openssl ecparam -name prime256v1 -genkey -noout -out private-key.pem
openssl ec -in private-key.pem -pubout -out public-key.pem
2/5 Generate jwks
You need to prepare a jwks file, which Kubernetes will use to validate the JWT tokens we send.
Install the jwcrypto library:
pip install jwcrypto
Run the jwks-generate.py script to generate the jwks file.
cat << EOF > jwks-generate.py
import argparse
import json
from jwcrypto import jwk, jws
from jwcrypto.common import json_encode
import time

def load_private_key(path):
    with open(path, "rb") as f:
        return jwk.JWK.from_pem(f.read())

def generate_jwks(key):
    print(json.dumps({"keys": [json.loads(key.export(private_key=False))]}, indent=2))

def generate_jwt_token(key, payload):
    jws_token = jws.JWS(json_encode(payload).encode('utf-8'))
    jws_token.add_signature(
        key,
        alg="ES256",
          protected=json_encode({
            "alg": "ES256",
            "typ": "JWT",
            "kid": key.kid  # 👈 Include kid in header
        })
    )
    return jws_token.serialize(compact=True)

def main():
    parser = argparse.ArgumentParser(description="JWKS/JWT Tool")
    parser.add_argument("command", choices=["generate-jwks", "generate-jwt"], help="Action to perform")
    parser.add_argument("--key", required=True, help="Path to EC private key (PEM format)")

    # JWT-specific arguments
    parser.add_argument("--sub", help="Subject claim")
    parser.add_argument("--aud", help="Audience claim")
    parser.add_argument("--iss", help="Issuer claim")
    parser.add_argument("--user", help="User")
    parser.add_argument("--exp", type=int, help="Expiration (in seconds from now)")

    args = parser.parse_args()
    key = load_private_key(args.key)

    if args.command == "generate-jwks":
        generate_jwks(key)
    elif args.command == "generate-jwt":
        now = int(time.time())
        payload = {
            "sub": args.sub or "[email protected]",
            "aud": args.aud or "example-audience",
            "iss": args.iss or "example-issuer",
            "user": args.user or "",
            "iat": now,
            "exp": now + (args.exp or 3600)
        }
        print(generate_jwt_token(key, payload))

if __name__ == "__main__":
    main()

EOF
python jwks-generate.py generate-jwks --key private-key.pem > jwks.json
Start jwks server and listen on port 8085 in next step you will create tunnel localhost:8085 -> ngrok endpoint
python -m http.server 8085
3/5 Downlaod ngrok
Open another window and continue in another terminal
# This is installation for linux, if you use another system got to ngrok.com
curl -s https://ngrok-agent.s3.amazonaws.com/ngrok.asc | sudo tee /etc/apt/trusted.gpg.d/ngrok.asc && echo "deb https://ngrok-agent.s3.amazonaws.com buster main" | sudo tee /etc/apt/sources.list.d/ngrok.list && sudo apt update && sudo apt install ngrok
You have to share jwks with https otherwise auth via jwt will not work.
ngrok http 8085
Ngrok will create tunnel which will be avilable for everybody from internet.
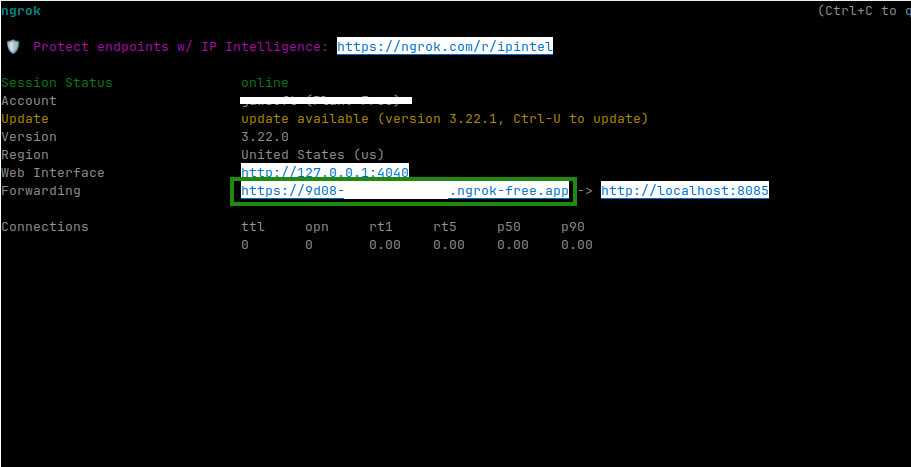
Open next new window and get your new external public url
NGROK_API_URL="http://127.0.0.1:4040/api/tunnels"
NGROK_EXTERNAL_URL=$(curl -s $NGROK_API_URL | jq -r '.tunnels[0].public_url')
We are getting close to the end, a the final step is prepare file for .well-known/openid-configuration
This is a standard endpoint for open Oauth 2.0 https://datatracker.ietf.org/doc/html/rfc8414
openid-configuration have to have you public_url otherwise will not work.
mkdir -p .well-known/
cat <<EOF > .well-known/openid-configuration
{
  "issuer": "${NGROK_EXTERNAL_URL}",
  "jwks_uri": "${NGROK_EXTERNAL_URL}/jwks.json",
  "subject_types_supported": [
    "public"
  ],
  "response_types_supported": [
    "id_token"
  ],
  "id_token_signing_alg_values_supported": [
    "EC256"
  ],
  "token_endpoint": "${NGROK_EXTERNAL_URL}"/token"
}
EOF
4/5 Prepare kubernetes
Generate AuthenticationConfiguration yaml with your public https url to jwks file.
We set up as audience aud:test and set claim map to {"username": "user"}. This attribute means:
if attribute username in your signed jwt token equal user kubernetes should accept that token.
mkdir -p k8s-config
cat <<EOF > k8s-config/authenticationConfiguration.yaml
apiVersion: apiserver.config.k8s.io/v1beta1
kind: AuthenticationConfiguration
jwt:
  - issuer:
      url: ${NGROK_EXTERNAL_URL}
      audiences:
        - test
    claimMappings:
      username:
        claim: user
        prefix: ""
      groups:
        claim: groups
        prefix: ""
EOF
Create local cluster via kind in your localhost. Below command will assign authenticationConfiguration.yaml to cluster as volume
ACTUAL_DIR=`pwd`
cat <<EOF > cluster.yaml
kind: Cluster
apiVersion: kind.x-k8s.io/v1alpha4
name: k8s-auth
kubeadmConfigPatches:
  - |
    kind: ClusterConfiguration
    metadata:
      name: config
    apiServer:
      extraArgs:
         "authentication-config": "/k8s-config/authenticationConfiguration.yaml"
         "authentication-token-webhook-cache-ttl": "5s"
      extraVolumes:
      - name: api-server-basic-auth-files
        hostPath: "/k8s-config"
        mountPath: "/k8s-config"
        readOnly: true
nodes:
  - role: control-plane
    extraMounts:
    - hostPath: ${ACTUAL_DIR}/k8s-config
      containerPath: /k8s-config
EOF
kind create cluster --config cluster.yaml --name=test
Apply role and privileges for user test via ClusteRoleBinding. We will allow test user to cluster-admin privileges.
cat <<EOF | kubectl apply -f -
apiVersion: rbac.authorization.k8s.io/v1
kind: ClusterRoleBinding
metadata:
  name: jwt-user-cluster-admin
subjects:
- kind: User
  name: test   # 👈 this matches the mapped username from your token
  apiGroup: rbac.authorization.k8s.io
roleRef:
  kind: ClusterRole
  name: cluster-admin  # or "view" / "edit"
  apiGroup: rbac.authorization.k8s.io
EOF
5/5 Send request
Generate jwt payload and sign by private key
export TOKEN=`python jwks-generate.py generate-jwt --key private-key.pem --iss $NGROK_EXTERNAL_URL --aud test --sub cluster --user test --exp 600`
Send request
CONTROL_PLANE=`docker port test-control-plane 6443`
curl -k -H "Authorization: Bearer $TOKEN" https://$CONTROL_PLANE/api
Expected response:
{
  "kind": "APIVersions",
  "versions": [
    "v1"
  ],
  "serverAddressByClientCIDRs": [
    {
      "clientCIDR": "0.0.0.0/0",
      "serverAddress": "172.20.0.6:6443"
    }
  ]
}
For another test you can download all configmaps.
# Get all configmaps
curl -k -H "Authorization: Bearer $TOKEN" https://$CONTROL_PLANE/api/v1/configmaps
Cleanup your environment and delete cluster
kind delete cluster --name=test
